

Overview
Aviatrix have developed their own Terraform provider which abstracts certain cloud native network and security functions from the main public cloud providers.
What do I mean by this? Well, VPC or VNET creation, for example, across multiple clouds using Terraform would require you to use the Terraform providers of the clouds in question (AWS, Azure, GCP, OCI, etc).
For example, building a VPC in AWS and a VNET in Azure would require writing a piece of terraform code referencing both AWS and Azure and using 2 different resource structures in your code.
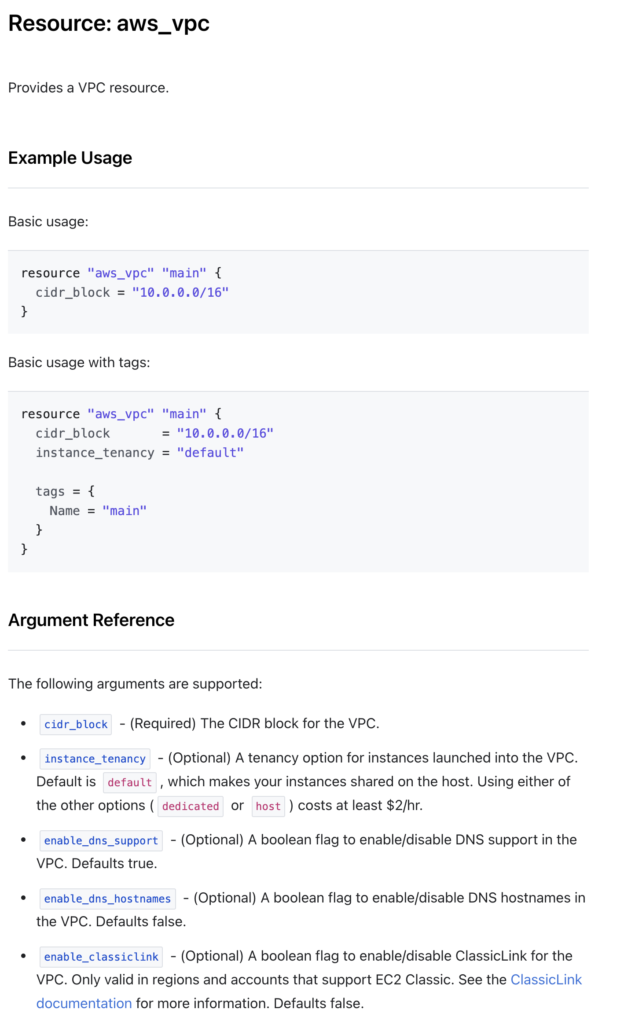
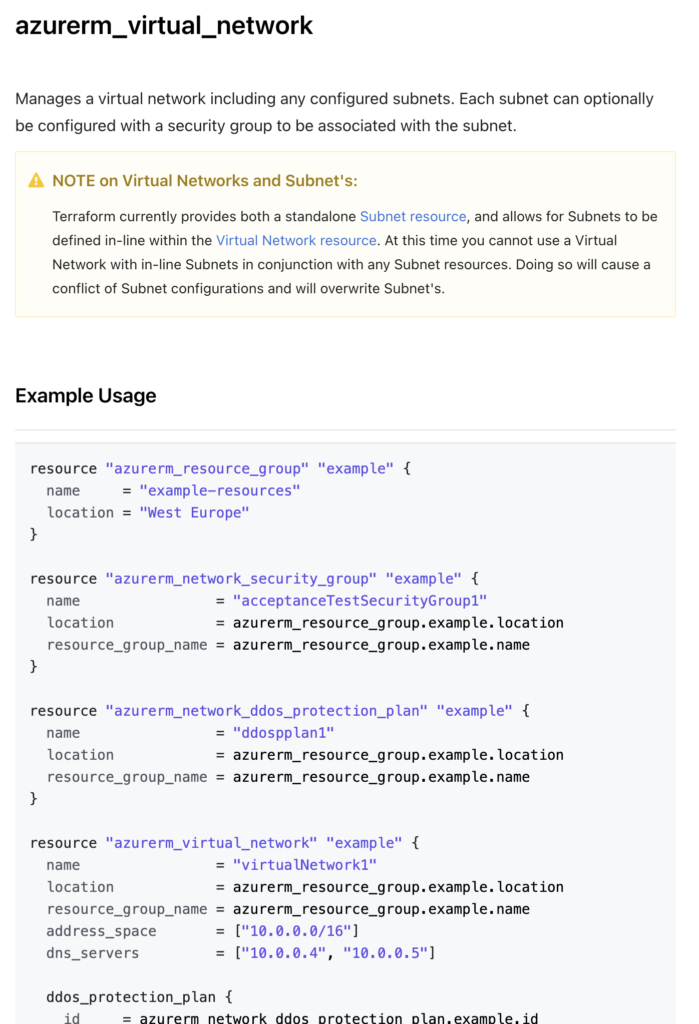
However, by using the Aviatrix Terraform provider you can simply reference one piece of code with consistent attributes with only the cloud type different between the two.
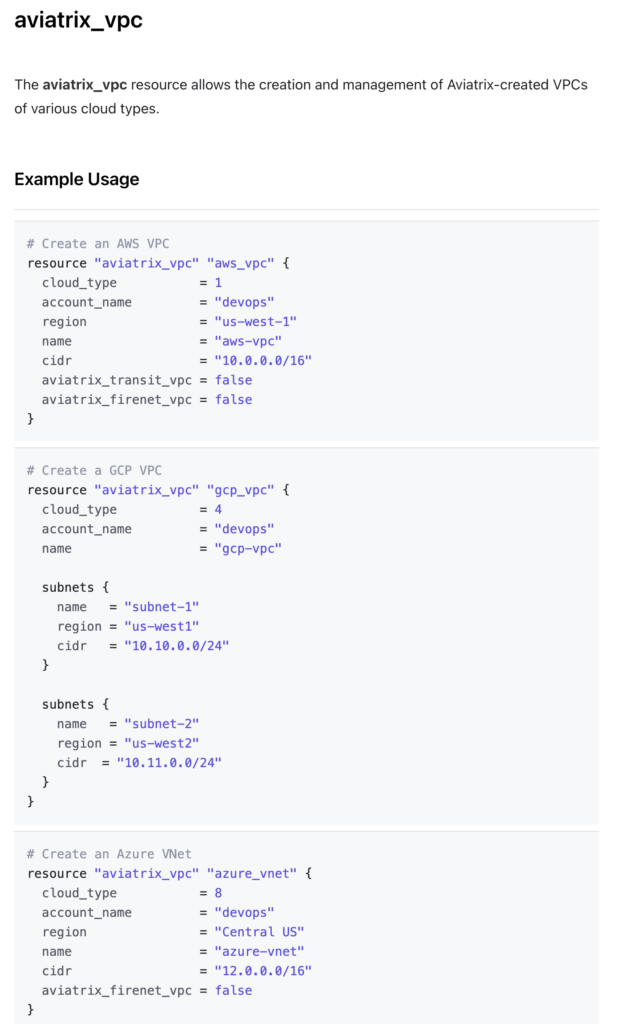
https://registry.terraform.io/providers/AviatrixSystems/aviatrix/latest/docs/resources/aviatrix_vpc
The best way to get familiar with these resources and what they actually build is by testing.
That’s the objective of this post: to get up and running quickly with the objective of testing different configuration settings going forward.
I created this post to share how I build a simple Aviatrix lab environment in around 10 minutes in AWS. This can be tweaked for any Cloud provider. Drop me a line in the comments if you get stuck on that.
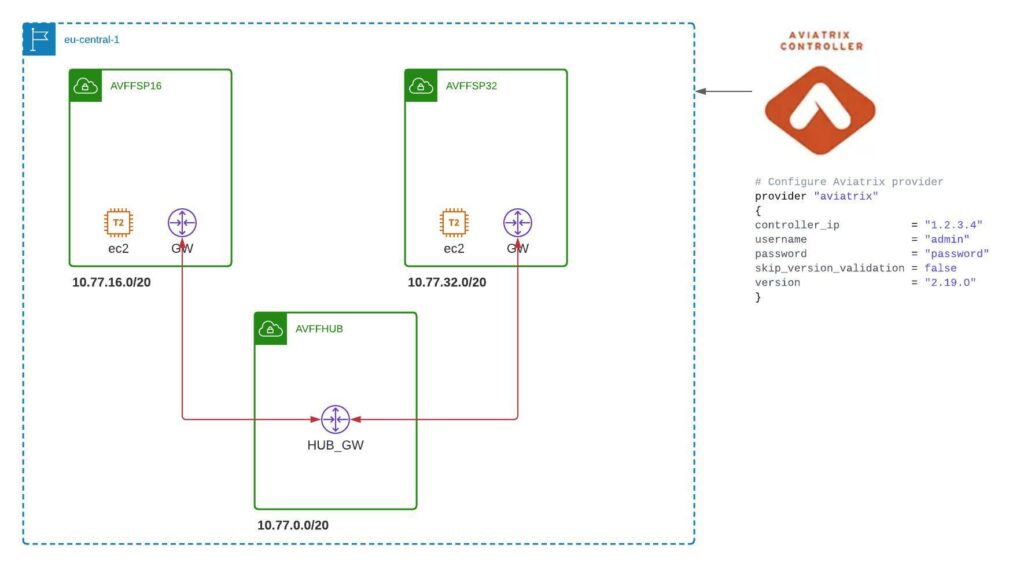
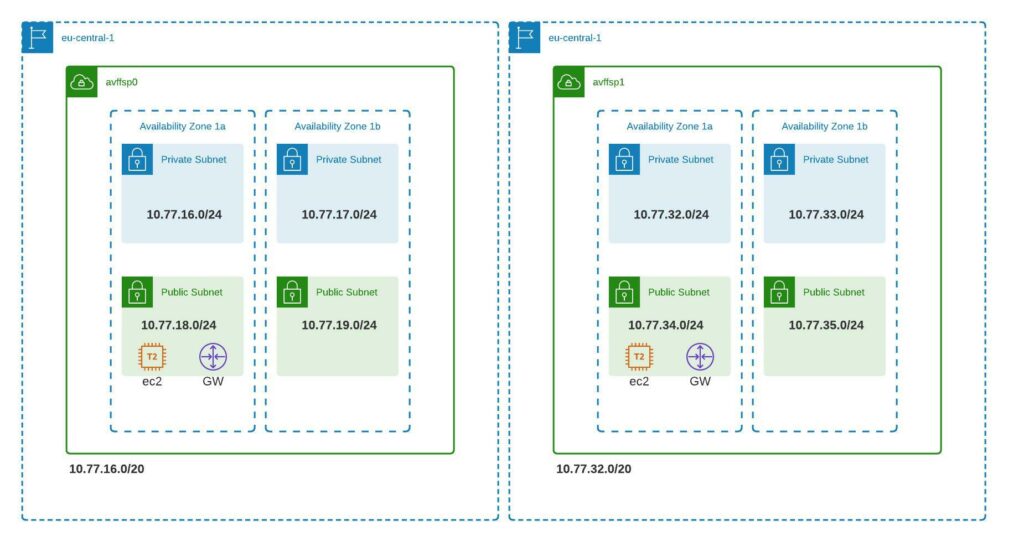
Below is a high-level overview of the lab we want to create:
We’ll be referring to 2 pre-created modules in this post. One of which I have modified to deploy the EC2 instances in the spoke VPCs. I wanted to have a light linux machine for testing.
A note on Terraform modules
A module in Terraform is a predefined piece of Terraform code that can be referenced in your configurations. It defines some input variables that you pass to the called module. Most modules are registered at the Hashicorp registry, but they can be referenced from other sources such as GitHub, S3 buckets, etc.
Below we will be referencing 2 modules by passing a number of variables to them for creation.
1. Transit Module
https://registry.terraform.io/modules/terraform-aviatrix-modules/aws-transit/aviatrix/latest
This module builds out the Transit VPC in AWS and has various inputs that can be manipulated. For the moment, let’s ignore those. We’ll come back to them in a future post.
2. Spoke Module
https://registry.terraform.io/modules/Eskimoodigital/aws-spoke-ec2/aviatrix/latest
The above module is just a modified version of the original Aviatrix module.
I had some difficulties adding the EC2 hosts using the existing terraform module below.
https://registry.terraform.io/modules/terraform-aviatrix-modules/aws-spoke/aviatrix/latest
I think this was because the subnet id was not exposed by the module, or in any case, I couldn’t manage to reference it. Therefore, I copied the module, modified it to do what I wanted and registered it under my own terraform account so I could use it.
Our Terraform Code
Here is the code I use to call the 2 modules.
# Build the AWS Transit
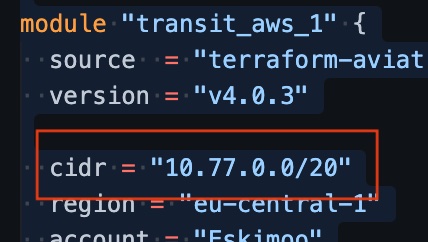
module "transit_aws_1" {
source = "terraform-aviatrix-modules/aws-transit/aviatrix"
version = "v4.0.3"
cidr = "10.77.0.0/20"
region = "eu-central-1"
account = "Eskimoo"
name = "avffhub"
ha_gw = "false"
instance_size = "t2.micro"
}
# Build the AWS Spokes
module "spoke_aws" {
source = "Eskimoodigital/aws-spoke-ec2/aviatrix"
version = "1.0.14"
count = 2
name = "avffsp${count.index}"
cidr = var.spoke_cidrs[count.index]
region = "eu-central-1"
account = "Eskimoo"
transit_gw = "avx-avffhub-transit"
vpc_subnet_size = "24"
ha_gw = "false"
instance_size = "t2.micro"
ec2_key = "KP_AVI_EC2_SPOKE"
}
The code can be found here:
https://github.com/Eskimoodigital/AviatrixAWSHubSpoke
I explicitly deactivate HA in order to control cost. I also specify a lower spec EC2 instance for the same reason. Neither of these concessions are best practice.
Step by Step
Step 1 – Build your controller out separately.
I deployed the controller on AWS using the Cloudformation template referenced below. This is the simplest way to deploy the controller and I normally shut it down when not in use. This ensures I don’t have to go through the onboarding of my Cloud accounts every time.
https://docs.aviatrix.com/StartUpGuides/aviatrix-cloud-controller-startup-guide.html
You will need to subscribe to Aviatrix in the Amazon marketplace.
If you have any problems getting the controller deployed, drop me a line in the comments and I will write a separate post on that.
Once you have the controller up and running, you need to onboard the CSPs you intend to use:
https://docs.aviatrix.com/HowTos/onboarding_faq.html
Step 2 – Clone the code repository
Now you should clone my code directory from GitHub here:
https://github.com/Eskimoodigital/AviatrixAWSHubSpoke
Simply clone this locally and open it in your favorite IDE. Now, you are ready to modify it for your specific needs.
If you need some help on using GitHub, check out my post here.
Step 3 – Modify the Providers
Go to the providers.tf file and you will find the below code:
provider "aviatrix" {
  controller_ip           = "35.162.98.189"
  username                = "admin"
  password                = var.ctrl_password

}
Modify the IP address to be your controller’s public IP address. The password is defined as a variable and you will be prompted for it when you run terraform plan or apply.
Step 4 – Modify your IP Addressing (optional)
If you want to use different CIDRs to the ones I use in the 10.77.0.0/16 range, then you will have to modify these in 2 places:
- in main.tf under the transit AWS module
- in vairables.tf under the spoke_cidrs variable

Step 5 – Modify the Account and EC2 Keys
In main.tf, under both modules, the AWS account name defined on the Aviatrix controller is referenced. You will need to change this to your particular account name.

Additionaly, under the spoke module, you need to modify the EC2 input to be the name of your own EC2 SSH access keys (these can be quickly configured and downloaded using the AWS console.

Step 6 – Run Terraform
You can now init, plan and run your code.
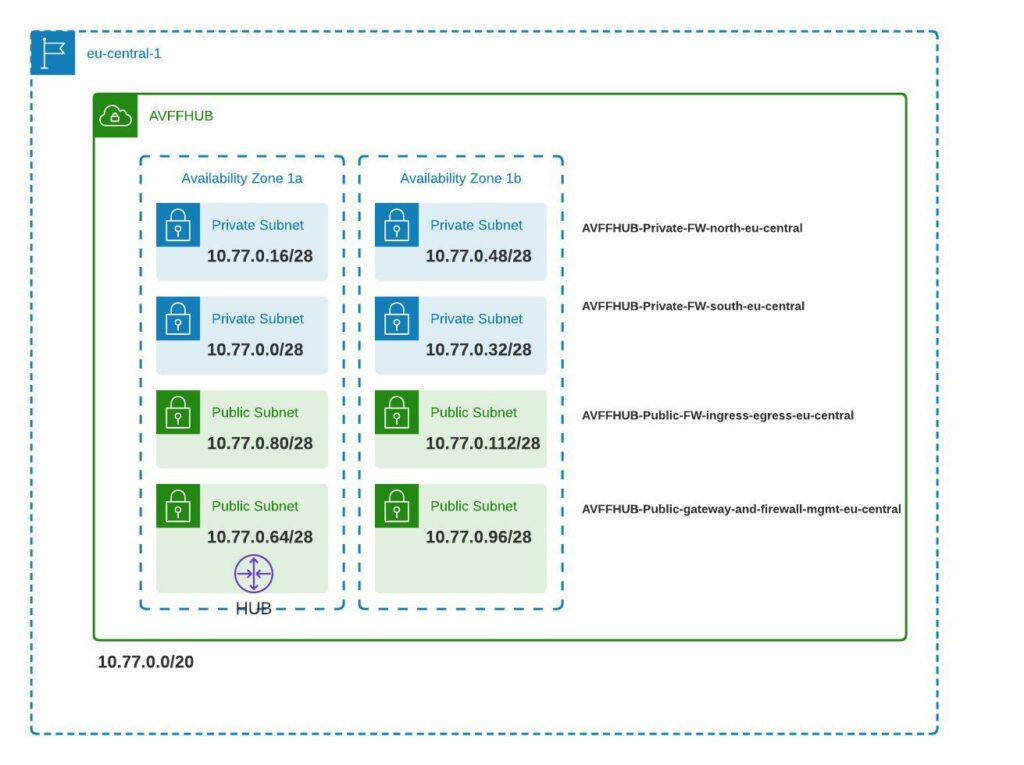
What Gets Built
The terraform code builds the below environment.
Aviatrix Sandbox (alternative)
Aviatrix has a sandbox starter tool that has been available for some time. It’s a great way to build an environment quickly to test some things out in a relatively cost-effective way. This method uses a docker image of EC2 instance which presents a web page with step by step instructions on building out the lab. However, it does not expose the Terraform code and allows for very little modification.
Verification
We can verify connectivity by pinging between the 2 spoke EC2 instances. All the infrastructure that gets built out to make this happen was abstracted from us. Have a look in the AWS console to see what was built running this piece of code. You’ll be surprised!
Otherwise, join me in the next post where I’ll go through in detail the different elements created.
Summary
So, for whatever purposes you may need a quick Aviatrix environment, you can of course use the sandbox, your own code, or feel free to use the code I’ve outlined in this post.

[…] Building an Aviatrix Lab using Terraform Aviatrix Lab Build using Terraform – Part 2 […]
[…] If you missed part 1, you can find it here. […]
[…] a previous post, I outlined deploying a simple hub and spoke network using Terraform. Using that post, you can repeat the same test I have done here […]